Last night (22nd January 2012) I decided to bake a cherry pie. Cherry pies are one of my favorite pies, next to a good dutch apple pie (Yum!). I found a couple of recipes that I could start out with since I only had frozen cherries to begin with.
I was amazed at how many recipes popped up on Google.com when I searched. I found one that I thought I should give a try and see how much I like it.
Here is the link to the cherry pie recipe that I found.
I had to make some adjustments to the recipe. For one, I didn't have 5-6 cups of frozen cherries, just had a small bag of it, so instead of 1 cup of flour, I used 3/4 of a cup of flour. Although, after tasting it, I think I should have used a 1/2 a cup. I kept the 1/2 cup of sugar because I like my cherry pies sweet!
First off, if your cherries are still in the freezer, get them out! The recipe says to leave them out in a bowl for at least one hour so they can defrost and the liquid from the cherries can come out.

After your cherries are thawed out, combine the flour and sugar mixture in a separate bowl

Then add your flour and sugar mixture to your cherries. Let the mixture and fruit set for about 15 minutes, stirring occasionally.

Instead of making my own pie crust (that's another adventure I will have to pursue later!), I just used your typical store bought pie crust. It normally comes two in a package. I gentle rolled out the first crust in my ungreased 9" pie pan (glass is preferred if you have one!) and pressed the bottom and sides to the pan.


Once you have your pie crust pressed into the pan, pour your cherries into the pie shell and spread out. Mine turned out to be a little on the thick side so I really had to help it along with a spatula. Also, my mixture was not over flowing like I hadn't wanted it to be, but it's a learning experience! Now I know that I need two small bags of frozen cherries!
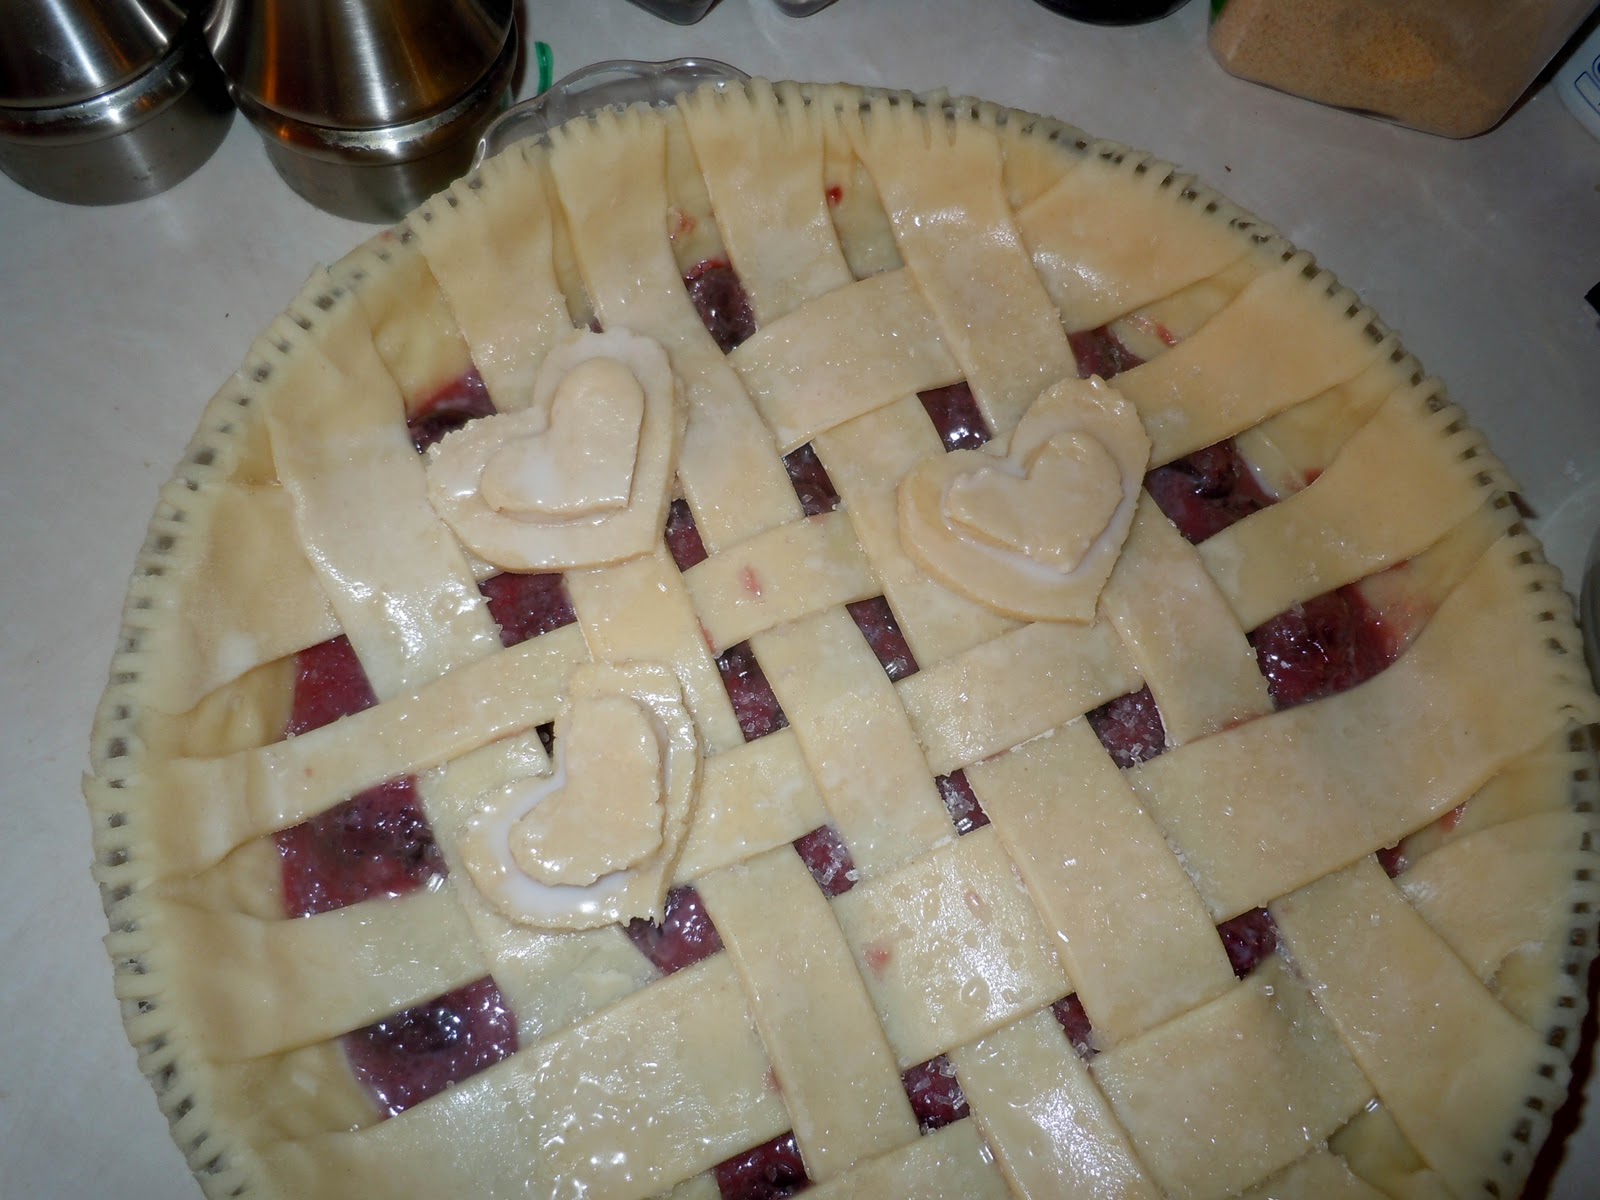
The next crust is up to you. Traditionally, the top crust of a cherry pie just has a couple of slits for "venting" the steam out of the pie while it bakes, but I'm not a big crust eater so I did the lattice crust instead. Plus I like the look of it. :-) I floured my countertop with some flour and rolled out the second pie crust. You could use a sharp knife, but I found that a pizza cutter is easier to use when cutting the strips. After all the strips are cut, I used the first longest strip of crust and laid it vertically at the center of the pie. I then used the second longest strip and laid it horizontally at the center of the pie on top of the first strip. I then weaved the rest of the strips and pinched it off with a fork and cut the extra crust around the pie pan. I found that these instructions were very helpful!

Once the finished with the lattice crust, I used a milk wash and brushed it all over the top. You could use an egg wash, but I did not have an egg to use. :-( I then sprinkled some clear sugar crystals over the top for that extra crunch.

I did a little "pie crust decoration" with the extra that was left over from cutting the strips and cleaning up the edges of the pan. I rolled out the rest of the crust and this time used a sharp knife to cut out one big heart and one little heart and placed it on top. I made two more sets of the big and little heart and made some sort of a design on the crust. I brushed the milk wash on top of them and this time sprinkled red and white sugar crystals.


I placed my pie in a preheat 425 degree oven for about 10 minutes. After the 10 minutes, I placed some foil around the edges of the crust so it would not burn too badly and reduced the heat of the oven to 325 degrees. I baked the pie another 55 minutes at 325. The recipe says 40-50 minutes after you reduce the heat, but every oven is different, so I had to add an extra 5 minutes to the 50 minute. And here we are!


I hope some of these instructions help you out when it comes to baking with little ones running around your feet. I know it helped me! Please feel free to share your creations and what adjustments you made! Every experience is welcomed. :-)
No comments:
Post a Comment